博文

Tutorial & Reflection

图片
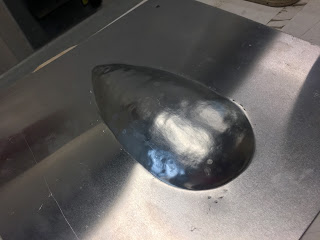
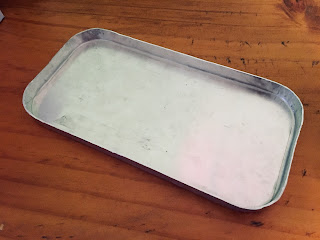
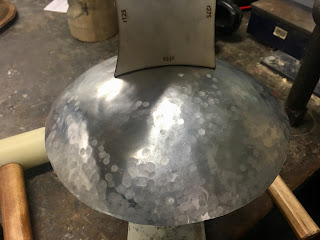
I decided to have a second go at the bowl.  Although it looks simple, it is not so easy to do it well.   I am not very satisfied with my first work. By analyzing the old one I did weeks ago and find out some problems and shortages: The curve of the bowl is gentle The depth of the bowl is not enough uneven surface Rough edges To started a new one, the Tool I used included: Marker; pencil Scissors Aluminium sheets Concave timber mold English wheel  Various hummers Sandbag Flat rasp Step 1-- Mark and cut Firstly,use marker or pencil to mark circles, not only mark the outline circle but also mark two more smaller circle inside,so that can use for guides when you are making the bowl,it's very important. Then cut out a square shape that is a little bit larger than the biggest circle you draw so that it will be easier and more accurate when cutting out the circle with scissors. Step 2 -- Shape the bowl Next Step is using  mallet and mold  the  conc

THE FUEL TANK

图片
Aim: For  this assignment we are required to create a 1:1 scale template replicating one of the motorcycle fuel tanks supplied.  We will using Software technology, laser cutting machines and techniques we learnt from assignment 1 to create an aluminium skin to adhere to a third of the fuel tanks contours. Our chosen fuel tank:  Harley 883 Iron fuel tank .  STEP 1---Make the Template Tools/Equipment:  1:1 Tank example Camera  Rhino Fusion 360 slicer First we take photos of the fuel tank at different angles and have a measurement.   Next step, we  used rhino  to recap the 3D model and used slicer to slice the model. We tried two kinds of ways to slice the model.  STEP 2 --- Laser Cutting and Assembling the Template Tools/Equipment: Laser cutter  Glue Masking Tape we   exported  2D sheets into PDF file  from slicer and  pu t  into illustrator, set the line weight and change  colour into red for  laser cut. Then using 3 mm thick board and lase

The Blister

图片

The Tray

图片
My Tray With My Team mate

The Torus

图片

The bowl

图片